

 Kunststof Forte BV
 How to install HPL and Trespa panels
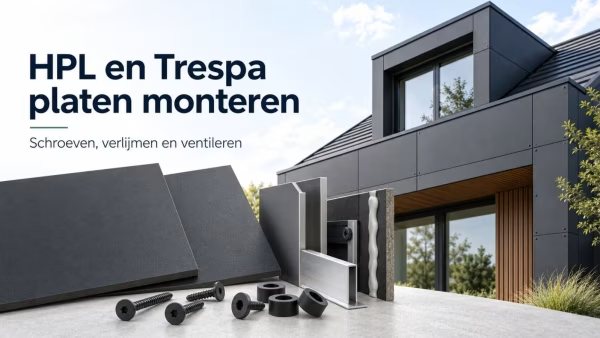
HPL and Trespa panels Install on a wooden battens or aluminium substructure. The panels can be mechanically fixed using suitable stainless steel screws or bonded using the appropriate adhesive system. During installation, it is important to take into account the expansion and contraction of the panel, the correct fixing method and adequate ventilation. HPL expands and contracts under the influence of temperature and humidity. Incorrect installation can lead to buckling, warping or problems around the fixing points.
Below you will find step-by-step instructions on how to professionally install HPL and Trespa Meteon cladding panels, the dimensions you should use, and the most common mistakes we encounter in practice.
Preparation: substructure and storage
A good installation starts with a level, load-bearing substructure. Use treated timber or aluminium profiles and ensure that all battens lie in a single plane; any unevenness will show through on the sheet surface. When preparing the site, bear the following in mind:
- Centre-to-centre distance between the lines: usually 400 to 600 mm, depending on the sheet thickness and wind load.
- Storage: Store the sheets in a flat, dry and sheltered place. Avoid storing them in a way that allows moisture to get between the sheets, for example under a tarpaulin.
- Protective film: Do not remove this until after installation, but no later than the time specified by the manufacturer.
- Lace edging: Before cutting the sheet to size, it is important to straighten the edges first, so as to ensure a true right angle of 90 degrees as a starting point.
- Cutting work: Use cut-to-size sheets as much as possible. If you do need to cut them yourself, read our tips for precision cutting of HPL.
Not sure yet which material is right for your project? In our guide to What is HPL? Read on to find out how the qualities differ.
Fitting HPL panels with screws
For mechanical fixing, secure the panel using colour-matched stainless steel screws, i.e. stainless steel screws with a coated head. This is the most commonly used method, as it allows the panel to be removed and the fixing can be visually inspected. Proceed as follows:
- Drill a pilot hole. Drill the fixing holes using an 8 mm HSS drill bit with a point angle of approximately 60–80 degrees. Always drill through a backing plate to prevent splintering on the reverse side.
- Make the drill holes larger than the screw diameter. A 4.8 mm screw must therefore not be fitted into a drill hole that is also 4.8 mm in diameter: the plate needs room to expand and contract.
- Keep a distance from the edge of the plate. Allow: at least 20 to 30 mm from the edge, depending on the sheet thickness.
- Do not tighten it too much. The screw head must not jam the panel. Use a screwdriver with a depth stop.
- Leave the joints open. Leave a gap of at least 8 mm between the panels.
Always use fasteners designed for this purpose, such as our Stainless steel Torx screws for HPL. With a timber substructure, spacers are also required; you can read about how they work later in this article.
Fitting Trespa using adhesive
Adhesive bonding is the recommended method if you want a façade with no visible fixings. This technique places greater demands on the preparation, as adhesion depends entirely on a clean and primed substrate. The process in brief:
- Clean and degrease the rear of the panel and the sub-frame profiles using Zettex Profi Cleaner.
- Next, bring Zettex Primer Z-05 Apply and allow to dry for the recommended time.
- Position the panel using double-sided mounting tape and also apply a continuous bead of adhesive using Zettex 65.
- The adhesive rail runs vertically along the substructure. This ensures that the cavity remains unbroken and allows any moisture to drain downwards along the rail rather than remaining trapped behind the panel.
The preparation of the substrate is crucial for a durable adhesive bond: it must be clean, dry and sound, and treated with the specified Zettex primer.
Accessories: corner profiles, wind braces and spacers
The finish determines how neat a façade ultimately looks. In addition to the panels themselves, you will need a number of accessories for almost every project to ensure that corners, roof edges and the cavity are finished neatly and are watertight. Below are the